
Now that you’ve written a Post in backstitch Studio, it’s time to share it with those you are trying to reach.
- There are several channels in which you can use Studio to share your content. Sending your message via Microsoft 365 Outlook is a great option for many organizations who use this email provider and are looking for an easy way to send bulk emails.
- Rather than using your native email platform directly, configuring Outlook with backstitch Studio comes with some added perks.
- Sending an email via this option uses the backstitch technology and allows your organization to view analytics — such as who viewed your message, when it was viewed and how it was viewed.
Pro Tip: Syncing your email provider with backstitch Studio will allow your organization to view employee engagement analytics that are not available via your native email provider.
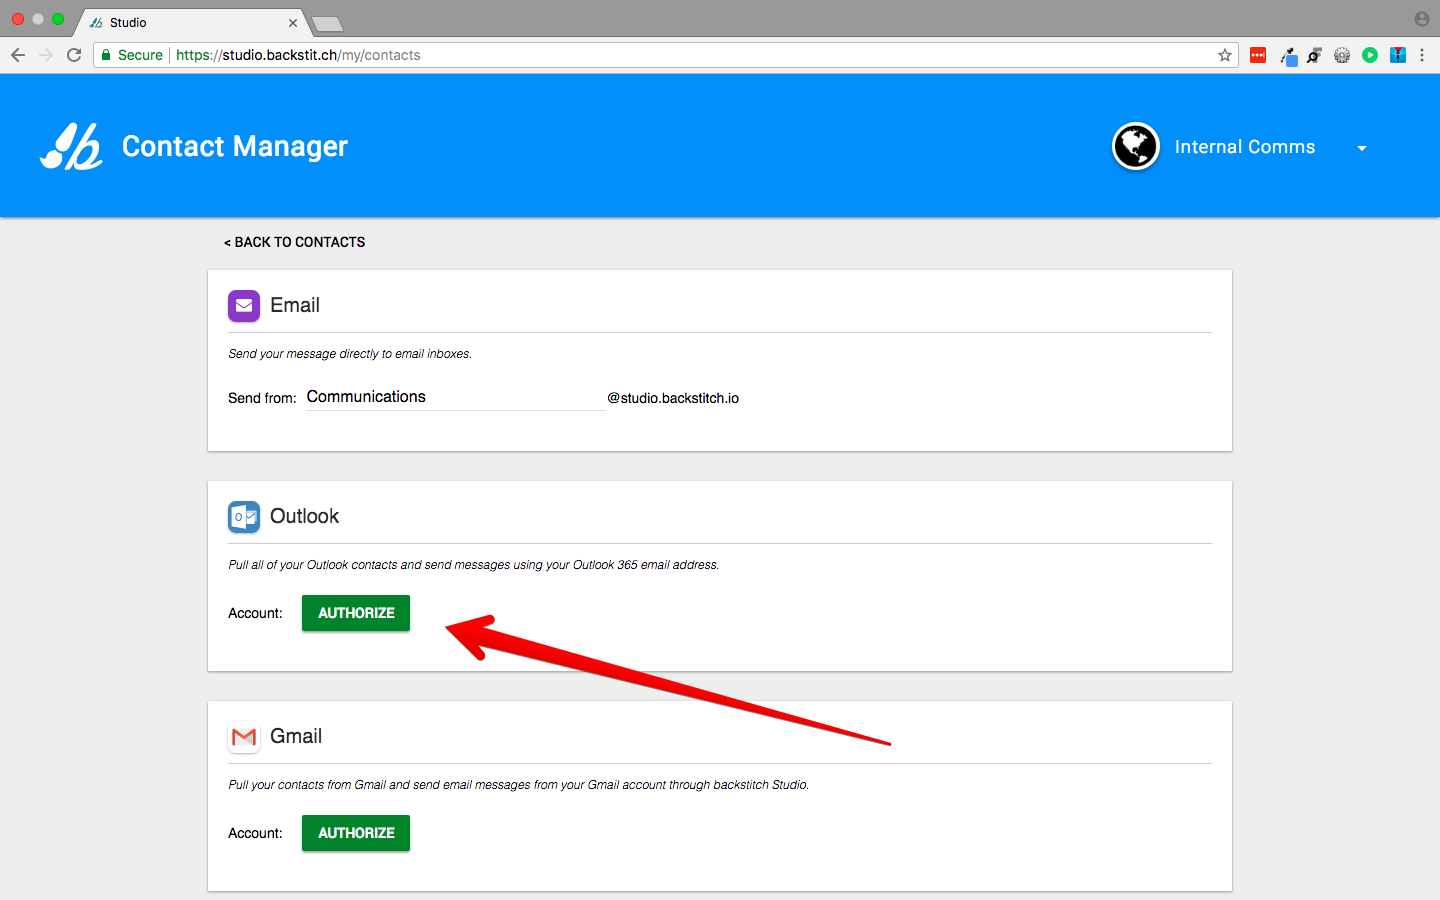
- On your home screen, click the drop-down menu at the top right of your page.
- Then select [Contact Manager] and click [Settings].
- Scroll to Outlook and click the [Authorize] button.
- This will bring you to a screen where you can enter your credentials. Once you have signed in, you are ready to rock n' roll!
If you do not see the [Authorize] button, and it just shows a button with [Unauthorize] and [Reauthorize] then it means you are already connected, and good to go! If needed, you can reauthorize your account by selecting [Reauthorize].
Caution not to [Unauthorize] as your Contacts Groups will be deleted.
-
-
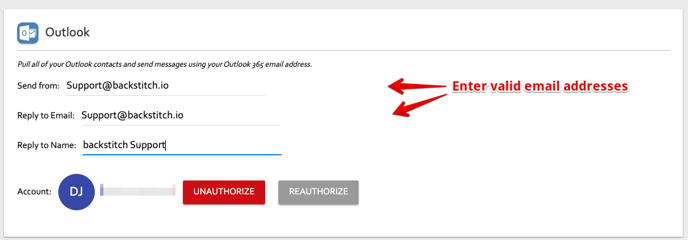
For the "Send from" and "Reply to Email" fields, use valid email addresses that you are authorized to use in Outlook (e.g. specific or alias email address.
-
The "Reply to Name" is a text field that can represent a name for the associated reply email address.
-
- You can also get to the Contact Manager from any Post.
- Begin by selecting [Review] of the Post you would like to work with.
- Select [Publish To] to open the dialog box of options.
- Select "Outlook" in the channel bar (left side of the dialog box).
- At the bottom left, you can select [Manage] to go directly to Contact Manager. If you don't see the [Manage] button, those contacts cannot be managed through backstitch (e.g. Slack contacts).
Pro Tip: Outlook authorization may require your Company's IT Admin to enable it. Follow these suggestions for assistance.